4 min read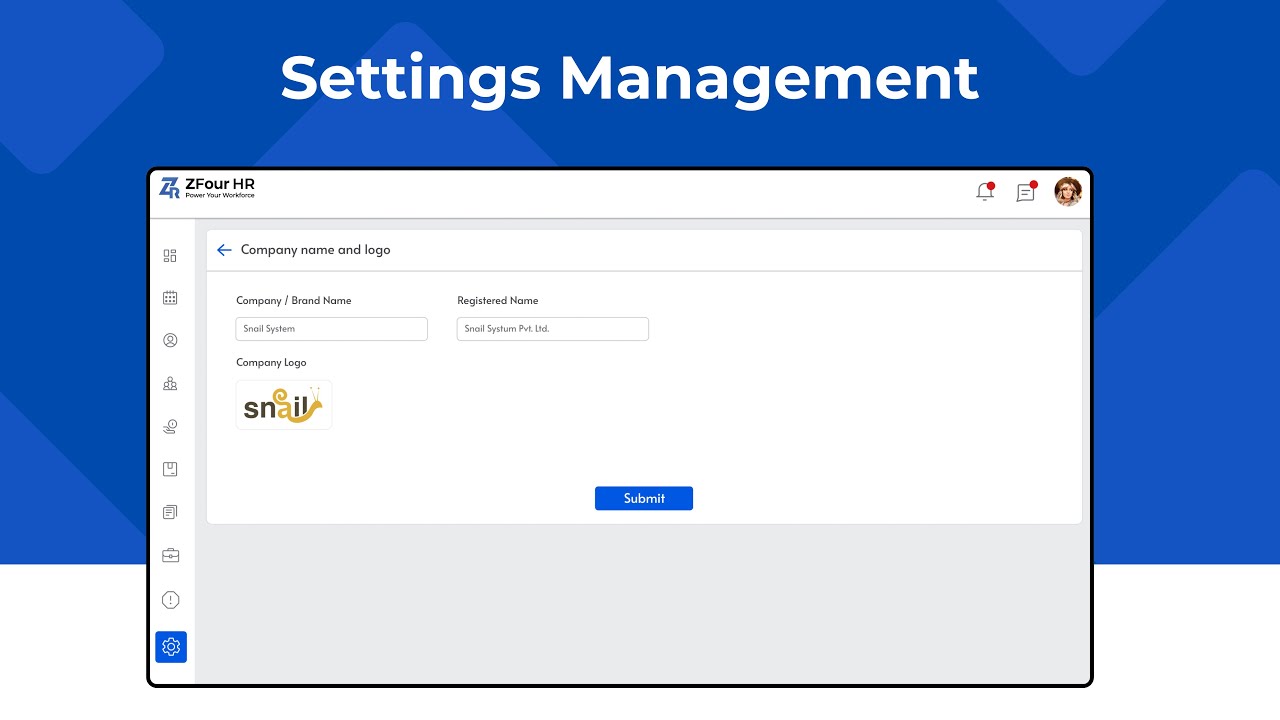
Before employees start using ZFour HRMS day-to-day, an admin needs to configure the foundational settings that everything else depends on — company details, organizational structure, and system-wide rules. Admin Settings is where this initial setup happens.
This guide walks through the core configuration steps, and points to dedicated guides for the more detailed settings (shifts, attendance rules, leave policies) that deserve their own deeper walkthrough.
Quick Answer: How Do I Configure Admin Settings in ZFour HRMS?
Log in to the Admin Portal and go to Admin → Admin Settings.
Enter company details (name, address, logo, contact information).
Create departments matching your organizational structure.
Add designations for job titles and hierarchy.
Configure shift, attendance, and leave settings (see dedicated guides for detail).
Set up notifications and email alerts.
The exact menu labels and available settings depend on your organization's ZFour HRMS configuration and version.
What Admin Settings Configure
Admin Settings function as the foundation other modules build on. Once configured correctly, attendance, leave, payroll, and approvals operate according to the rules set here, without needing manual correction for routine cases.
The core areas configured here include:
Company details and branding
Departments and designations
Shift, attendance, and leave rule references (configured in more detail elsewhere)
Notification and email alert preferences
Initial Setup: Step by Step
Step 1: Log In to the Admin Portal
Log in with your admin credentials to reach the main dashboard.
Step 2: Open the Admin Section
From the left-side menu, select Admin — this contains company-level configuration, including departments, shifts, leave rules, and system settings.
Step 3: Open Admin Settings
Within Admin, locate Admin Settings (sometimes labeled "System Settings" depending on your version).
Step 4: Enter Company Details
Update your organization's information — company name, address, logo, official email, and contact number. This ensures reports, emails, and employee dashboards display accurate company information.
Step 5: Create Departments
Add the departments that exist in your organization (HR, Sales, Marketing, Finance, IT, etc.). Setting up departments before adding employees makes reporting and employee organization more accurate from the start. SHRM notes that organizational structure defines the hierarchical reporting and authority relationships within a company — getting this right in the HRMS is essentially digitizing that structure, so it's worth reflecting your actual reporting lines rather than a simplified version.
Step 6: Add Designations
Define job titles and hierarchy levels (Executive, Manager, Team Lead, Director, etc.). Correct designations support accurate approval routing and organizational reporting later.
Settings That Deserve Their Own Deep Dive
Three configuration areas within Admin Settings are substantial enough to warrant their own dedicated guides, rather than being fully covered here:
Setting Area | What It Covers | Detailed Guide |
|---|---|---|
Shift Settings | Shift names, timing, breaks, weekly offs | |
Attendance Rules | Grace periods, late marks, overtime, geo-tracking | |
Leave Policies | Leave types, carry-forward, encashment, holidays |
If you're setting up any of these three specifically, the dedicated guides go into significantly more depth than a general setup walkthrough can cover.
Step 7: Configure Notifications and Email Alerts
The last step in initial setup is deciding who receives alerts, when emails should trigger, and which actions require approval notifications. Once configured, employees, managers, and HR are informed automatically without HR needing to send manual updates for routine events.
Why Getting Initial Setup Right Matters
Admin Settings affect every other module downstream. If company details, departments, or designations are set up incorrectly at the start, the errors tend to surface later as confusing reports, misrouted approvals, or inconsistent employee records — problems that are more time-consuming to untangle after employees are already using the system than they would have been to prevent during initial setup.
Best Practices for Initial Setup
Set up departments and designations before adding employees.
Employee records reference these structures, so having them in place first avoids re-categorizing employees later.
Don't rush through company details.
These appear across reports, emails, and employee-facing screens — errors here are visible to everyone using the system.
Configure shift, attendance, and leave settings using the dedicated guides.
These areas have enough nuance (grace periods, overtime rules, leave carry-forward) that treating them as a quick checkbox during initial setup often leads to configuration gaps discovered later.
Test notifications after setup. Confirm alerts are actually reaching the intended recipients before relying on them for time-sensitive approvals.
Final Thoughts
Admin Settings is the foundational configuration layer in ZFour HRMS — company details, departments, designations, and notification preferences that other modules depend on. For the more detailed configuration areas (shifts, attendance rules, leave policies), it's worth using the dedicated guides rather than treating them as a quick step in initial setup, since getting those specifics right has a direct effect on attendance accuracy and payroll processing later.
Ready to set up your organization in ZFour HRMS?
Book a ZFour HRMS demo.

Farheen Ahmed
HR Tech Content Strategist at ZFour Technology Private Limited
Research-driven content on HRMS, payroll, attendance management, employee management, and modern HR technology for Indian businesses.